
Description
Following concepts are introducted first
- Concept of a group
- Concept of linking versus copying a ruleset to project
- Global rulesets
Following steps are done in this section
- Creating a new ruleset
- Promoting ruleset as group ruleset
- Creating new rules to group ruleset - restricting element value
- Modifying rule within group ruleset
- Unlinking and linking group rulests
Prior information about groups
Group rulesets
Purpose of a group ruleset is to enable a ruleset to be active in multiple projects. This potentially saves a good amount of time if there are multiple payment types where validation rules are needed and if the validation rules are shared between them. Modifying or creating a rule within group ruleset automatically applies the change to all validation projects where the ruleset is active
Group ruleset function is same as normal ruleset from validation point of view - person validating cannot know if a ruleset is a group ruleset or not.
Ruleset being a group ruleset does not automatically mean that it is active in multiple projects, it instead enables this possibility.
Linking and copying group rulesets
To activate a group ruleset to a validation project two different ways of doing it are possible: linking it or copying it.
When ruleset is linked, ruleset within the project remains to be a group ruleset. All changes done to group ruleset will automatically be activated in this ruleset - they are linked after all.
When ruleset is copied to a project, duplicate of group ruleset is made but it is not linked. This means that the ruleset which is copied will contain all the rules there are within the group ruleset but they exist as their own individual entities, no longer linked to the group after the copy is made. Therefore possible further changes to the group ruleset will not be active in the ruleset which was copied.
Global rulesets
XMLdation experts maintain certain common rules as global rulesets. As we want to make sure these rules are not accidentally changed by our clients, rules within them may not be changed. Otherwise they function on the same way as group rulesets.
Example of global rulesets are ISO 20022 business rules and CGI-MP working group related business rules
Instructions
1: Creating a new ruleset
This is a step we have already made once in Basic 1 part of the training, but we should do a new, additional ruleset in the project we created earlier so we can have both normal and group ruleset active at the same time. At this point, if coming straight from task 3, validator will most likely be selected. We'll have to navigate back to Stdand select create new ruleset.
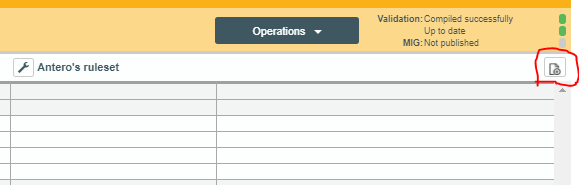
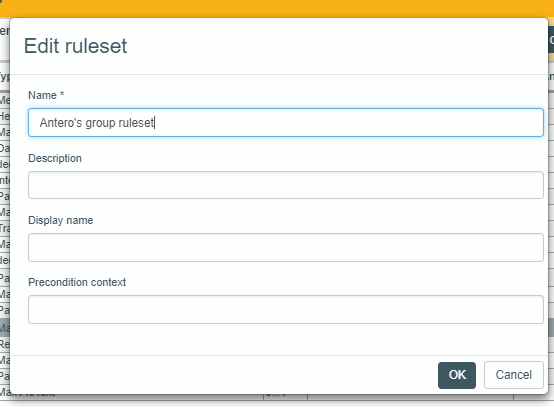
Familiar modal opens. This time we can name the ruleset differently. Name of the ruleset should be unique if there are more than one person taking part of the training to keep these rulesets organised. Group rulesets will be visible to everyone having access to the group.
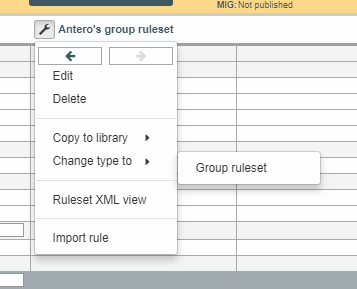
2: Promoting ruleset as group ruleset
The ruleset we made in phase 1 is a normal ruleset. In order to make a group ruleset, normal one has to be promoted to it. We'll do this next, via group ruleset settings, change type to -> group ruleset
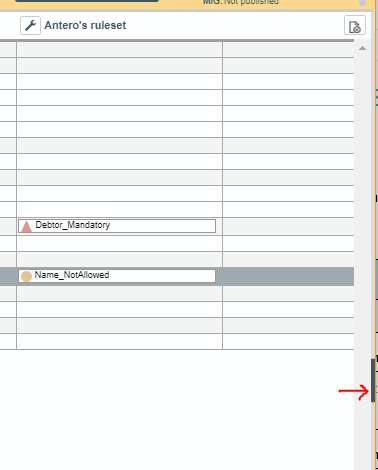
After this is done, the ruleset will change place as Studio will always show group rulesets before normal ones by default. We also see a new icon next to the ruleset
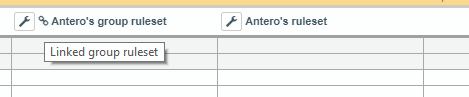
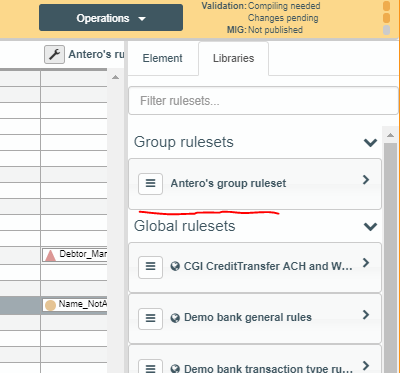
Indicating the ruleset indeed is a group ruleset. This ruleset is now also shown in the right-hand-side navigation
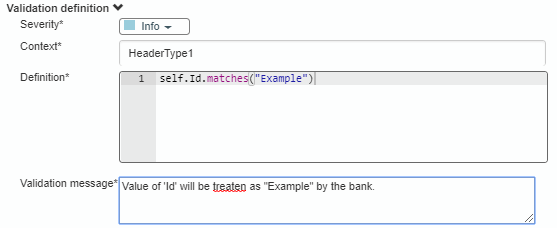
3: Creating new rules to group ruleset - restricting element value
Creating new rules to a group ruleset functions in a same was as creating them into a normal one. However, it is important to keep in mind these rules created to the group ruleset will become active in every project using the group ruleset. However, at this point this project will be the only project using the ruleset.
This time we can try out restricting element values. We'll do this via "value restrictions" option in the rule creation dropdown
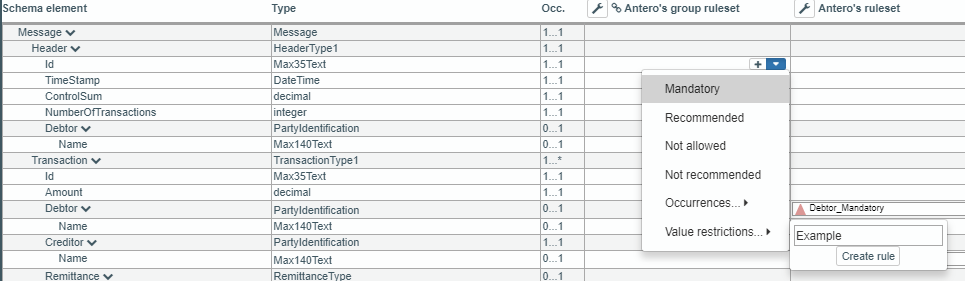
After create rule is pressed, we can try out the validation to verify new rule works. It is worth noting here that both Studio and the validation service can be used, but if normal validation is used, project has to be complied and deployed before the change becomes active
4: Modifying rule within group ruleset
Modifying rules within group ruleset again works similarly than modifying normal rules, but modification possibility has to be enabled first. We can do this by double clicking a rule we want to modify, thus opening rule modal:
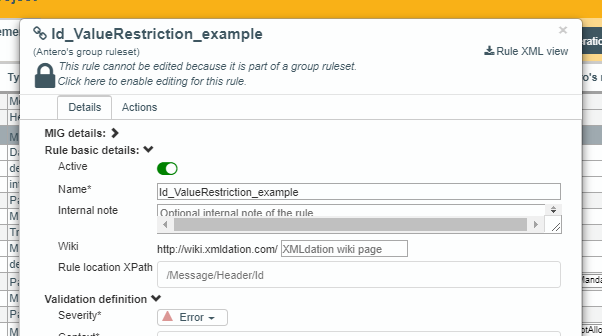
And then selecting the lock-icon

The reason for this is to prevent accidental modifications to group rulesets. To make sure user does indeed want to modify rules which potentially are active in multiple differnet validation pipes.
For this rule, we can now make changes. We could, for example, turn the rule into info and change the wording of message.
5: Unlinking and linking group rulesets
Next, we'll deactivate and activate group rulesets. Deactivation is done by unlinking it to be active from the project
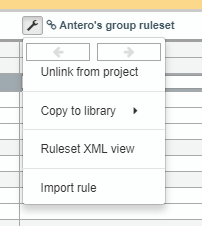
Thus removing it from the UI. However, we only unlinked the project and did not delete it. This means we can reactivate it later on in this project or in any other project.
Reactivating the ruleset is done by finding it from the right-hand-side navigation and dragging it to the main work-area. Two different options are given here:
- Drag here to copy
- Drag here to link
Differences of these are explained at the start of this page. In this case, we want to link this ruleset back to the project, so we'll drag it to the lower section of the area.
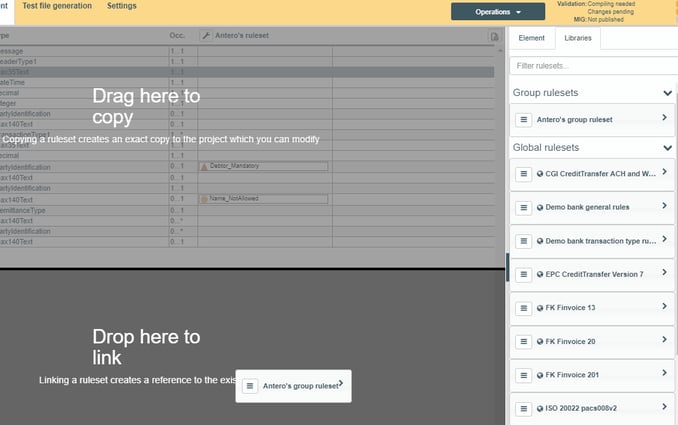
After doing this, we have the ruleset back in the project.
This concludes the main features when doing validation rules. In the next section we'll investigate other features of a project.